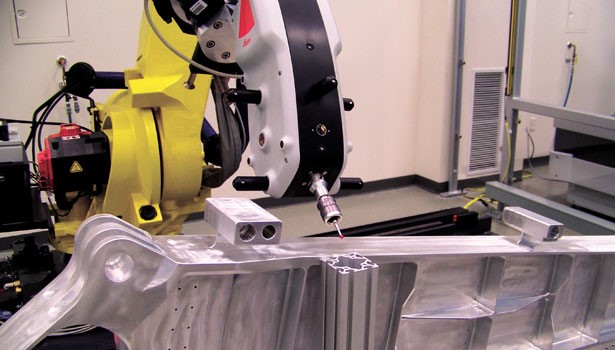
The manufacturing sector in North America is at a crossroads – it must either follow Japan and Germany as leaders in automation, or struggle (and fail) to claw back low-skill, low-pay jobs from developing markets. Forward-thinking manufacturing companies are investing heavily in greater automation, moving toward a future where the Internet of Things seamlessly connects products with machines and factories can run fully automated. That vision is still some time off, but greater automation, cell manufacturing, and more closely integrated inspection are all key to the future success of North American manufacturers.

Metrology is a key component in the race to automate, as more efficient metrology means fewer machine tool errors and higher quality products. Faster production and better quality are where North American factories must compete to stay alive. Increased CNC automation has led to an inevitable uptick in demand for automated metrology equipment, with companies opting for either near-line or inline equipment.
Near-Line Coordinate Measuring Machines
Coordinate measuring machines have come a long way from the days when they absolutely had to be kept in a climate controlled lab. Shop-floor coordinate measuring machines reduce inspection times compared to the lab, but they don’t have the throughput for true inline measuring and 100 percent inspection. Hard bearings and sealed guide ways make these coordinate measuring machines suitable for use despite the contaminated air of the shop floor, while real-time temperature compensation allows products to be inspected as they come out of the cell. Near-line inspection remains an effective way of catching machine tool errors before too many parts are produced and need to be scrapped or reworked.
Automated Inline Metrology Equipment
While shop-floor coordinate measuring machines provide highly accurate, near-line metrology, inline automation requires faster measuring. There are two types of equipment that can be integrated into an automated manufacturing cell: white light scanners and the Renishaw Equator.
White light scanners like an AICON 3D system available from local metrology dealers like Canadian Measurement Metrology use active triangulation to rapidly collect 3D data. White light scanners can be integrated into coordinate measuring machines or portable arms to capture data so quickly that vibration is not an issue. They output data in 3D models and act as a great introduction to 3D metrology and effective tool in automation.
Then there is the Renishaw Equator, a piece of equipment that’s not quite a coordinate measuring machine and not quite a hard gage. It measures at 1000 points per second, and while it does not deliver the accuracy of a coordinate measuring machine, it is repeatable. By measuring a master part with a slower, more accurate coordinate measuring machine, you can use the Equator to measure all subsequent parts against it. A Renishaw Equator can be integrated into a cell that combines both machining and inspection, bringing metrology closer inline than ever. Alongside a number of software and operation courses, Renishaw Equator training is also available from CMM for shops that want to integrate this effective inline measurement tool.
If automation is the future of manufacturing, your inspection capabilities must keep up. There’s a saying that goes, “If you can’t measure it, you can’t make it.” Don’t let your inspection procedures cause bottle necks and delay deliveries. An independent metrology shop like CMM can help you upgrade your facilities to meet the challenges of modern-day manufacturing. Get closer to the source with inline and near-line inspection and start reducing labor costs, manufacturing defects, and downtime.

